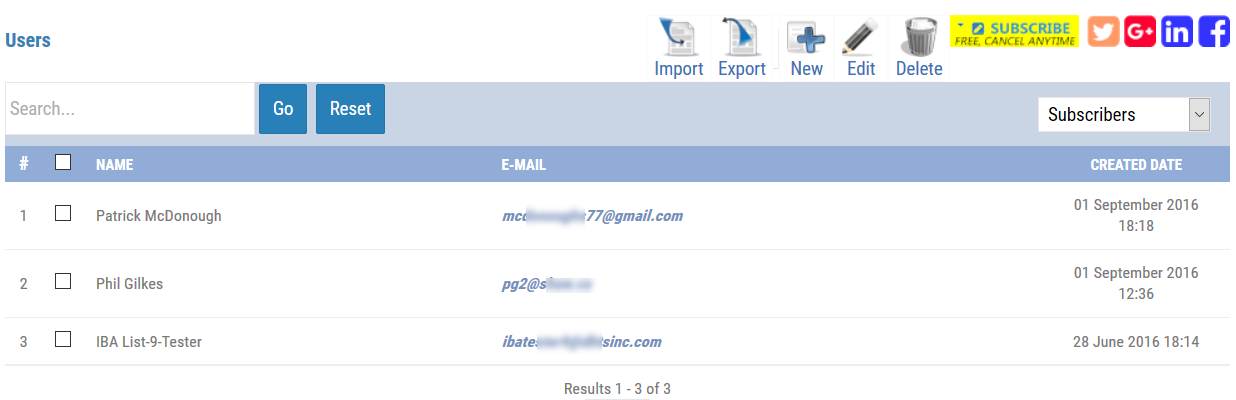
How to access this screen
- Click on the the “hamburger menu” icon.
- Click on “Manage Subscriber List”
NOTE: UPLOADING 3rd PARTY LISTS IS PROHIBITED. Adding names from LinkedIn, Facebook, Purchased Lists, Association Lists, etc.may be legally prohibited, seldom take your newsletter and complain to the email Blacklists. You may decide to contact these lists using your own email and offer them your newsletter. Here's how to include the link to the "Subscribe" form for your newsletter.
Toolbar
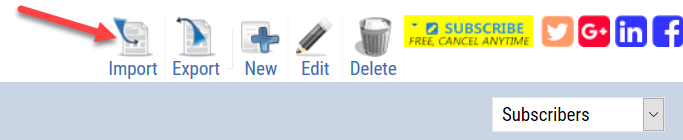
- Import : If you click on this button, the people (we’ll refer to them as “users”) on the list will be imported.
- New: Will give you a form to enter just one person.
- Edit: Allows you to edit an existing person.
- Cancel : Return to the Users management listing.
Source
The Import screen lets you to import users from different sources.
The newsletter system keeps track of the subscription of your users and if they unsubscribe! This way, even if you try to import twice the same users.
The newsletter system will take care of the duplicate entries and won't subscribe an existing user again. However, it will give you the option to overwrite an existing record with the imported information which is useful if you know a person updated their name.
(Helpful information: Their email address is used to locate their record since it uniquely identifies the person. If their email changes, the system will add them as new and block their old record when the old email address bounces.)
IMPORTANT NOTE: Regardless of which of the following you use to add users you cannot have more than one separator character which must be between the name and the email address. Make sure you don't have stray separators in your content. For example, if your record contained:
John Hubbard,jhubbard@doesntdeliver.net it would work OK (only one comma)
John Hubbard,LLD, PhD,jhubbard@doesntdeliver.net would not work (multiple commas).
- Text Area : Instead of uploading a file, you can directly copy/paste your contacts in an input box and let The newsletter system import them.
- File : Import your users from a CSV or a text file.
![]()
The newsletter system will import users as unsubscribed and automatically send them an opt-in confirmation request they must click to begin getting your newsletter. (Why? FocalPoint requirement and also to help comply with CanSpam, CASL and other laws governing sending email in other countries.)
If you have a list to add that has already opted in to a newsletter you have, send it to Customer Service with a your certification that all the records had given you prior permission to send them email and we’ll load them for you as confirmed.
The newsletter system keeps track of the subscription status of the user so that even if you import someone who had unsubscribed, the newsletter system won't resubscribe anyone who already unsubscribed.
Adding Records
All records added need to have a name and an email address separated by a delimiter so the system knows where the name ends and the email begins. This requirement applies to the TEXTAREA and FILE imports.
That delimiter can be a comma or a tab character but it needs to be used consistently. So the system knows the order your information is in, the FIRST LINE OF THE IMPORTED DATA MUST be the field name corresponding to the content. The order of the fields is not important but you do have to tell the system what’s what. For example:
email,name or name,email. If you used a tab: email name or name email.
Your records would look like this:
The TEXTAREA lets you to directly enter one or more people to your list and import them and is generally the easiest and most flexible way to add records.
Enter your records in the text area, click on the "Import" button. That will read in your records and take you to the second import page where you will be able to review your records before you import them and also set some import options (normally, the default settings will work fine).
File
You can browse to and import a CSV file you created previously or that was exported from outlook or another program in CSV format.
The first line of your CSV file must contain the name of the fields in the order they are to be imported and have a field delimiter like a comma or tab character separating them. For example, if your file contains a list of users with the format "email,name” the first line of your file should be "email,name".
The newsletter system does not impose any CSV format and is able to import files with any kind of separator but we find that a comma or tab works best.
Example:
name,email
john,john@example.com
adrien,adrien@example.com
mike,mike@example.com
If you have an excel file with all your contacts, simply add a new line at the top to indicate the column name (email, name...) and then save your file in a CSV format (Save as -> CSV). Then import your CSV file in The newsletter system. You can open your file with a text editor (notepad for example) to check if your file has the right format.
Once you selected your file, click on the "Import" button, you will get to the second import page where you will find all the import options.
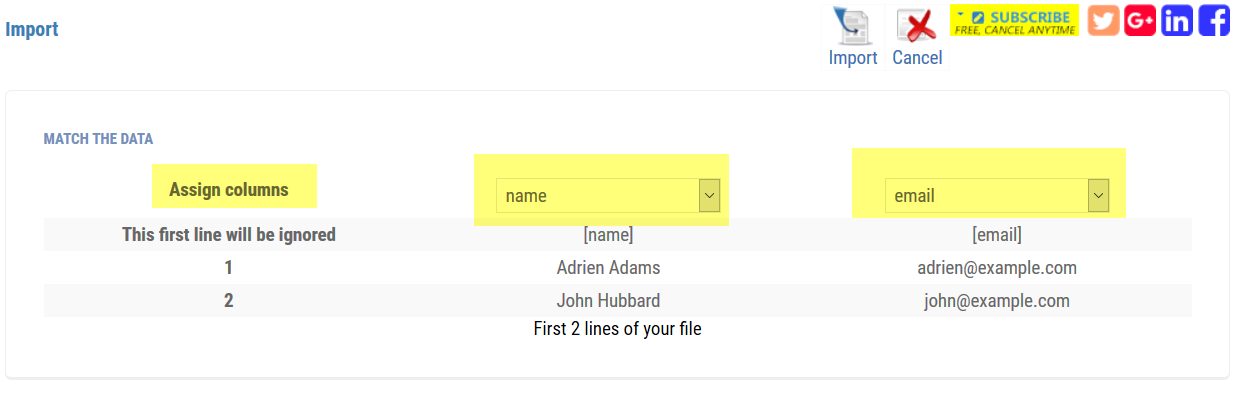
Second Import Page - Sample of records for verification
If you made a mistake you can let the system know what is in each field using the drop down list in the button above each column.
Second Import Page - Import Parameters
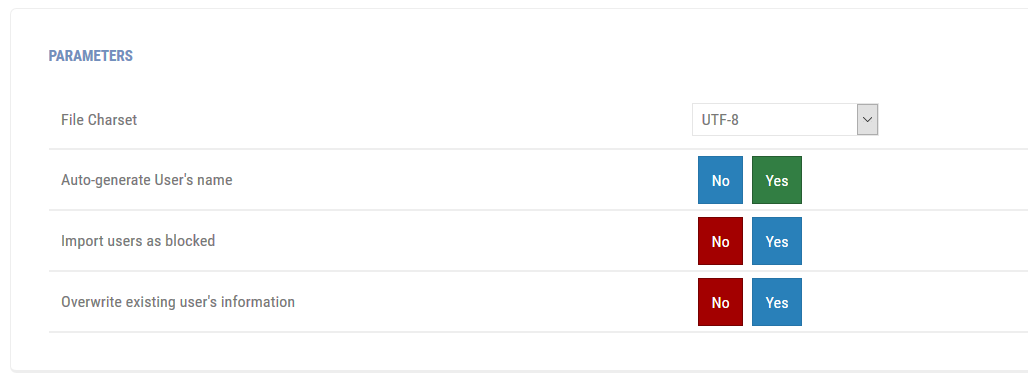
- File Charset: We recommend you to import an utf-8 file but if you import another format, you can let The newsletter system handle the conversion in which case you should specify the encoding format of your imported file/text area data.
- Auto-generate user's name: If you import a file and the name field is empty, The newsletter system can automatically generate a name for each user (based on its e-mail address by considering the content before the @ sign as the name.).
- Import users as blocked: You can choose to import the users as blocked (will not be sent anything) or not. This is sometimes useful if you are not sure your import will work correctly.
- Overwrite existing user's information: By default (option turned OFF), if the user already exists (based on its e-mail address), the user information won't be updated.
If you turn ON that option, the user's data will be updated so for example if you import a file including an existing user (same e-mail address) but with a new name, the user's name will be updated in The newsletter system.
Once you selected the options and assigned the columns as you want, click again on the "Import" button to complete the import of your users.
Confirmation Screen
A confirmation screen will let you know the results of your import showing the number of records read, the number of invalid records – usually a screwed up email address – the number of duplicates and the number of people subscribed.

TERMINOLOGY: The use of the term “added” means the records were added to your list. However, it does not yet indicate the person has agreed to take your newsletter. To be sent your newsletter, a person must have clicked the Opt-In message they were sent, confirming they want your newsletter. (That will change their status from Confirmed = No to Confirmed = Yes.)
If the person’s record is blocked or not enabled or unsubscribed, the newsletter will not be sent to them.